
In this article, I will demonstrate that how we can do a PST migration from Exchange Server to Office 365, we can import one single pst or multiple PSTs at once.
NOTE: you would need to have "Import Export role" assigned to your admin account be able to perform this action.
The process is pretty simple and straightforward, but require some preparation, I will explain the process step by step.
1st step, Export Mailbox data to PST file which you wish to migrate to office365.(Things to keep in mind before you start mailbox export place forwarding on the mailbox so new emails get delivered to new mailbox)
2nd step, upload all the data to Cloud.
Let's walk through the step, sign in to EOP (Exchange Online Protection Portal) (https://protection.office.com)
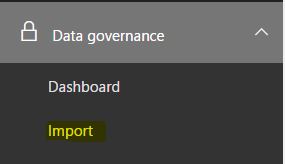
On next screen, click on "New Import Job".
This will bring up options to create a new Import Job.
Here, Provide the Job Name.
Note: Job name has few limitation please make sure you met the following "2-64 lowercase letters, numbers, hyphens, and underscores, must start with a letter, no spaces"

Next screen will bring up options for data import, Select Upload your data, and click Next.

Next, you will come across import data instructions.
In 1 step, you will be presented a link to detailed instruction guide, find the link here
2nd step, you need to click on "Show network Upload SAS Url", Click on this link to get the Network Update Url, once you see the URL copy it somewhere.
3rd step, before you could upload the PSTs, you need to install the Azure AzCopy Tool, Download the tool from the link given in the instructions and install it on the system where you have access to PST files.
Once the AzCopy is installed we are ready for upload.
Next, Open the command prompt and run the command in below format to initiate the PST files upload.
For Example: AzCopy.exe /Source:\\FileServer\PSTs /Dest:<SAS URL> /V:"c:\PstImportLogs\log.log"
Below is a Sample SAS URL (Taken from Technet article)
"https://3c3e5952a2764023ad14984.blob.core.windows.net/ingestiondata?sv=2012-02-12&se=9999-12-31T23%3A59%3A59Z&sr=c&si=IngestionSasForAzCopy201601121920498117&sig=Vt5S4hVzlzMcBkuH8bH711atBffdrOS72TlV1mNdORg%3D"Note: If you wish to review the PST file in SAS storage location, you can check the uploaded files using the Microsoft Azure Storage Explorer tool (for details instructions visit here)
Next, Once PST file import finishes, we need to select the check boxes "I am finishing uploading my files" and "I have access to the Mapping File".
Next screen will bring up the CSV file import section, we need to setup the CSV file in Below format, you can download the sample from here
Workload,FilePath,Name,Mailbox,IsArchive,TargetRootFolder,ContentCodePage,SPFileContainer,SPManifestContainer,SPSiteUrl
Exchange,,testuser.pst,testuser@contoso.onmicrosoft.com,FALSE,/,,,,
Next, upload the CSV and click on Validate to check for any errors.

If its successful click on the save.

After that, you will see the Success Screen and can close the wizard.
Now the Analysis process will begin, after the Analysis finishes you will be able to click on the
"Import to Office 365".

Which will bring you two options
Do you want to filter your data?
a) Yes, I want to filter it before importing. (select only if you don't want to import everything)
b) No, I want to import everything. (select for importing everything)

Select 2nd and click on "next" to import everything.

On next screen click "Import Data", that should complete the import request with Success Message.

Further, you can monitor the progress of each PST import and can also Delete the Job From here.

This completes the PST import request, now you can monitor the mailbox statistics and you should see the increase no of items in the mailbox.
Office 365 allows this migration, thank you for sharing how to do this. User guides at office.com/setup contain helpful information related to migration. Great blog.
ReplyDelete