For New GUI method visit my new blog post link below.
https://www.sunilchauhan.info/2019/02/exporting-user-mailbox-to-pst-from.html
Microsoft is Moving in-place eDiscovery & hold from ECP to EOP console under Content Search in Search and Investigation Options.
In this post, I will be showing how do we export emails to PST using the Content Search Options.
Before you start the process make sure you met the below system requirements.


Next window leaves all the options blank unless you wish to do a specific search, and hit next.

Once the Search is Completed, you will see the Search Statistics, and the Start Export options will be available.

Once you click on "Start Export" option you will see different options to select.

Then click on Start Export.
You may come across the below error, you might be thinking you already have permissions, but here is the catch, permissions are managed separately for this portal so you need to get the permission before you can start the export.

Note: It may take up to an hour before your permission starts to work.

Next Click on Download Exported Result.


https://www.sunilchauhan.info/2019/02/exporting-user-mailbox-to-pst-from.html
Microsoft is Moving in-place eDiscovery & hold from ECP to EOP console under Content Search in Search and Investigation Options.
In this post, I will be showing how do we export emails to PST using the Content Search Options.
Before you start the process make sure you met the below system requirements.
- 32- and 64-bit versions of Windows 7 and later versions
- Microsoft .NET Framework 4.5
- A supported browser:
- Internet Explorer 8 and later versions
- OR
- Mozilla Firefox or Google Chrome, with the ClickOnce add-in, installed
So Login to protection.office.com and browse through the Content Search Option under Search & Investigation.
Click on + Icon to start a new search, and provide Name for the Search, Under "Where do you want us to look?" Select "Custom Locations selection" and "choose Specific Mailboxes to Search" then Click on "+ " icon to select Mailboxes for which you wish to Export to PST.
Below screen shows the default options, you can select the 2nd options to include all items including the one unrecognized format or are encrypted and weren't indexed.
Enable de-duplication options will skip the duplicate emails, check only if you need to skip items in long conversation emails.
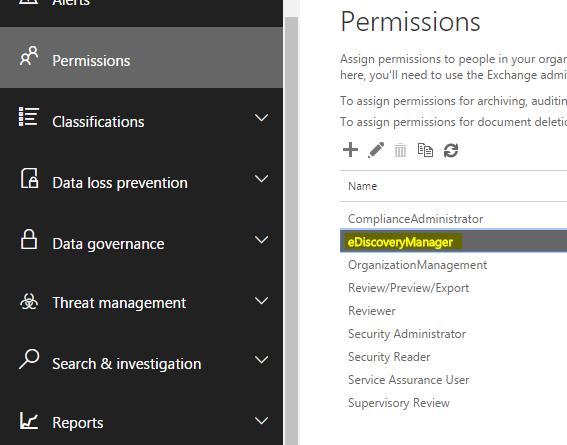
To add the permissions go the Permissions Tab on the same portal, and add your admin account into eDiscoveryManager Role Group.

Once the preparing Data finishes, you will see the below options, click on the Download Results. will download an application "Microsoft.Office.Client.Discovery.UnifiedExportTool.application", if you gets some errors in starting export, it means that you have missing prerequisites for browsers, make sure you met all the prerequisites, mentioned in the beginning.
Once you click on the Download Results you will see the below pop up,
Once the app is installed, you will see the below popup screen to provide the Export Key, copy the export key and provide the location for saving PST.
after that PST download will be started and you will see the progress.
I hope you guys will find this post informative, please feel free to leave your comments and feedback.
Comments
Post a Comment